Wednesday, July 31, 2019

CREATING HEALTHY COMFORT FOOD WITH SEASONAL PRODUCE


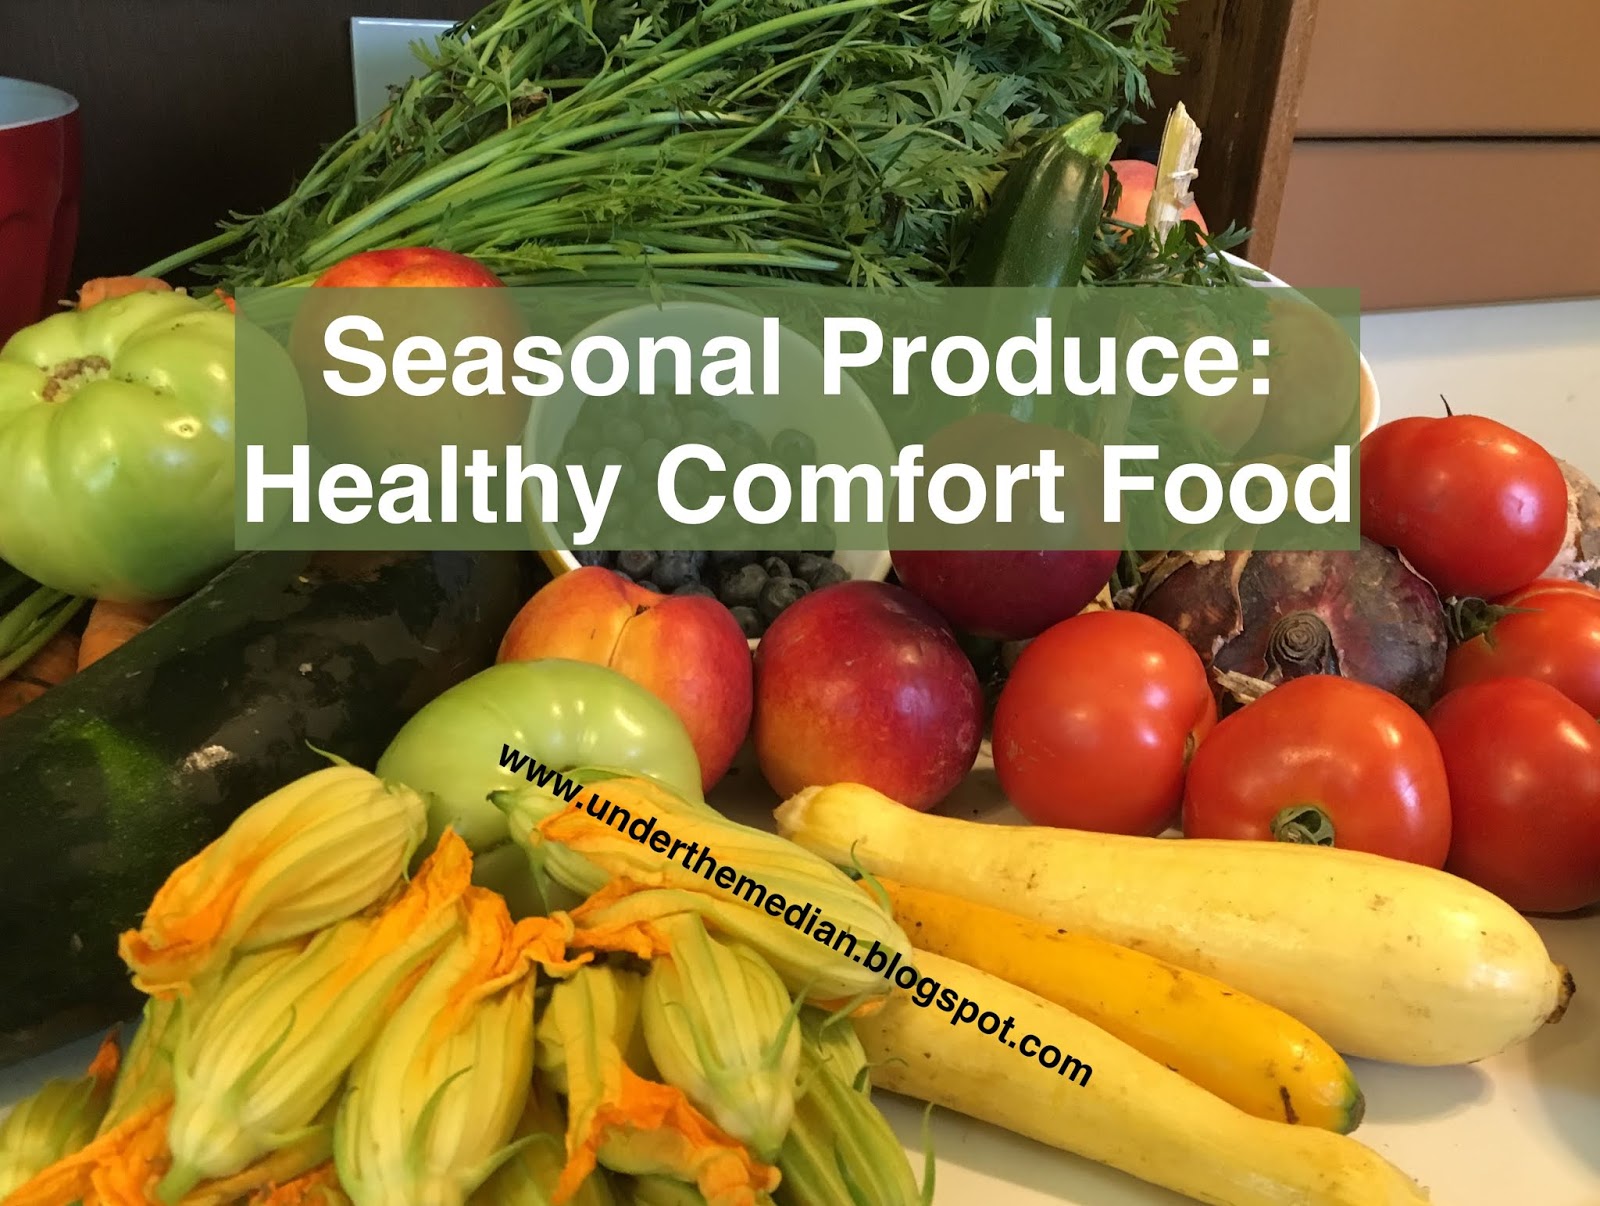
I love comfort food! I mean, who doesn't? Nothing is better than a great, big bowl of homemade mac-n-cheese or a big bowl of fried potatoes to lift your spirits. Unfortunately, much of what reminds us of weekends at grandma's is full of cholesterol, saturated fat, and a glut of excess calories.

Never fear! There is a way that you can still enjoy those "down home" flavors, without any of the guilt. This week, let's take a look at comfort food made healthy!


Potato Salad with Dill Mayo


This dill potato salad is a creamy, flavorful delight and, yet, it contains absolutely no eggs or dairy. The "mayo" is potato based and you won't believe how it gives you that same decadent, mouth-feel without weighing you down with too much fat.  Do yourself a favor and make a double batch. It will go fast! 


Zucchini "Mac-n-Cheese"


This recipe is original to Under the Median and made a huge amount. My younger boys ate it by the bowlfuls of Zucchini Mac-n-Cheese and begged for more!  Creamy, decadent flavor with no added oil, dairy, or cholesterol! Yum!


Air Fried Zucchini chips


These zucchini chips couldn't be easier to make! The air fryer is a wonder of technology, which simplifies no-oil frying, making it an option for those seeking a healthier lifestyle. However, if you don't own an air fryer. No worries! I give traditional oven instructions in the post (and it's just as easy to make them in your oven!)

Stuffed Squash blossoms in the Air Fryer


This new Under the Median recipe has been the season's break out winner! It's been one of the most popular recipes I have ever created. My oldest son had a party last week with several of his college age buddies. I set out platters of food, one of which was Vegan Stuffed Squash Blossoms in the Air Fryer.

Vegetable Ragout with Lemon Basil


Although stews are often thought of as wintertime fare, this one features the fantastic flavor of lemon basil. If you've never had it, this herb tastes seriously like a fresh burst of lemon. I love it! So, I created this special recipe to showcase its unique flavor. Head on over to the post, where I tell you all about lemon basil, how to use it, and then give you the low down on how to create your own vegetable ragout with lemon basil.

5 Minute Soft Serve Peach Nice Cream 


Nothing says "Summer!" like a bowl of cold, creamy ice cream. So, how about something that will give you that special ending to an evening of al fresco dining like a bowl of fruit based nice cream, without any fat, dairy, or additional calories. Yes 'ma'am!


If you enjoyed this post, you may also like: 


Follow us:  


https://www.facebook.com/underthemedian/


https://twitter.com/Underthemedian

https://www.instagram.com/underthemedian/


Receive posts via e-mail !  Fill in the "follow by e-mail" link found on the right side of the blog just under my profile. 


Do all to the glory of God, 

Hope

ZUCCHINI CHIPS IN THE AIR FRYER


When zucchini is in season, you get offers of this abundance from every corner. I hate wasting food, especially if that food is given to me. Ask my kids, they will tell you that it is my number one pet peeve. The rule in our house is: If it is given to us, we gratefully accept it as God's provision and we use it!


Seasonal produce is a FANTASTIC way to S-T-R-E-T-C-H your food budget!

But, sometimes it's hard to figure out new ways to use it. We like to lightly bread zucchini with gluten free flour and then stick it in the air fryer. IF YOU DON'T HAVE AN AIR FRYER, no worries! Honestly, if you plan to do a lot of zucchini chips, it's easier to place them on a parchment paper lined baking sheet and bake at 375 degrees until lightly browned.

Zucchini chips are: 

  • Crispy
  • Refreshing
  • Salt free
  • Dairy free
  • Egg free
  • Oil free
  • A great way to use zucchini!
  • Perfect for parties!
  • Incredibly inexpensive to make!

Let me show you how easy it is to make zucchini chips!


Follow these five easy steps!


Step 1: Slice zucchini into even rounds no more than 1/4 of an inch thick. 

Don't get them too thin, or they will burn. Try to keep them all the same, general thickness.


Step 2: Dip each piece briefly into a small bowl of water. 


Step 3: Lightly bread each piece, by rolling in the seasoned GF flour mixture. 


Step 4: Air fry or oven bake. 


Air fry at 400 degrees for 18 minutes, turning after 10 minutes. Oven bake at 375 degrees for 25-30 minutes, turning half way through. No matter how you choose to cook them, watch them carefully after they start to show a hint of brown. They will burn quickly. 


Step 5: Enjoy plain or topped with salsa or marinara sauce. 


Ingredients: 

Fresh zucchini
1 cup gluten free flour (I used 1/2 cup Bob's Red Mill GF flour and 1/2 cup almond flour) 
2 Tbsp onion powder
1 Tbsp garlic powder
1 Tbsp salt free seasoning (your choice) 
a small bowl of water 


Directions: 


MAKE SEASONED FLOUR: In a small bowl, mix 1 cup of GF flour with the rest of the seasonings. Mix thoroughly. Set aside. 

SLICE ZUCCHINI into even rounds, about 1/4 of an inch thick. Dip each round briefly in water. This will insure that the coating sticks. Drench in the seasoned flour mixture one piece at a time. 

AIR FRYER: Place in air fryer and fry at 400 degree for 18 minutes, turning after 10 minutes. Check to see that the chips are lightly brown and slightly crispy. If not, return to air fryer for another 3-5 minutes. WATCH THEM CAREFULLY! They will burn quickly once they start to brown!

TRADITIONAL OVEN: Place on parchment paper lined baking tray. Bake at 375 degrees for 25-30 minutes, turning half way through when the first side has browned. Watch them carefully! They will burn quickly once they begin to brown at the edges. 

SERVE HOT! You can eat them plain or topped with salsa or marinara sauce. 

Serves 6. 

For a free, downloadable PDF of this recipe, click here. As always, it's absolutely free and my way of saying, "Thanks for being an Under the Median fan!" 

If you liked this recipe, you may also enjoy: 


Follow us:  


https://www.facebook.com/underthemedian/


https://twitter.com/Underthemedian

https://www.instagram.com/underthemedian/


Receive posts via e-mail !  Fill in the "follow by e-mail" link found on the right side of the blog just under my profile. 


Do all to the glory of God, 

Hope

Vegetable Ragout with Lemon Basil


This blog is all about saving money and one of the best ways you can do that is by cooking from scratch. That's why I'm constantly in the kitchen, coming up with new recipes for you to try.

Today's post is centered around a recipe that will remind you of the flavorful soups and stews that, perhaps, came from your grandmother's kitchen.

Vegetable Ragout is: 

  • Comfort food
  • Filling
  • Economical
  • Easy to prepare
  • Healthy
  • Vegan

What is lemon basil?


Lemon basil, a cross between two varieties of basil, is known for its lemon-like flavor and aroma. It seriously smells like lemon!  I absolutely love it! The 14 year old sous chef spied it at the farmers market on Saturday and begged me to buy a bunch. He loves to put fresh basil on sandwiches of all kinds, especially those involving a slice of fresh tomato.

Here are some things you need to know about lemon basil. 


  • I employ two main preservation methods for herbs: dehydrating and freezing. However, this herb does not take well to either. It's not that you can't "put it by" for winter use, but you will lose some of the strong lemony qualities that make it so wonderful. 
  • This herb is best used fresh. After a day or two, it begins to lose some of its flavor. 
  • Don't overcook lemon basil. Add it at the very end of cooking and it will lend a surprising burst of freshness to dishes like soups, stews, and stir fries. 

Ingredients: 


1 1/2  cups diced onion
3 cloves garlic
1 cup water (divided use)
2 tsp. smoked paprika
1 Tbsp. salt free seasoning (your choice)
2 tsp. onion powder
2 tsp. garlic powder
3 Tbsp tomato paste
6 cups yellow squash cut into 1/2 inch cubes
4 1/2 cups cooked chickpeas (or 3 cans drained and rinsed)

1/2 cup fresh lemon basil
3 medium diced tomatoes


Directions: 


Add 1/4 cup water to the bottom of a pan. Add onion and garlic and saute over medium heat until softened and opaque. Add all spices except the fresh lemon basil. Add tomato paste, stir, and continue to cook for 5 minutes, allowing the tomato paste to slightly caramelize. Add an additional 3/4 cup water cup water. Stir well, loosening any browned bits from the bottom of the pan. Add squash, cooking over medium heat until softened. Add the tomatoes. Reduce heat, cooking for an additional 10 minutes. The final mixture should be thick (like a stew), with just a little liquid remaining in the bottom of the pan. Only now, at the very end of the cooking time, do you throw in the finely chopped fresh lemon basil. I actually turn the heat off, add the basil, replace the lid of the pan and wait five minutes. The basil will be wilted and will have released all of its glorious essential oils and flavor into the stew.

Serve as is or over a bed of brown rice or quinoa, garnished with additional lemon basil. It also makes a really good hot baked potato topping!

Serves 6-8. Yield 10-12 cups.

For a free, downloadable PDF of this recipe, click here. As always, my recipes are free and my way of saying, "Thanks for being an Under the Median" fan! 


  Enjoy! If you try this recipe, I'd love to know what you think. Leave your thoughts in the comments section.

If you enjoyed this post you may also like: 


Follow us:  


https://www.facebook.com/underthemedian/


https://twitter.com/Underthemedian

https://www.instagram.com/underthemedian/


Receive posts via e-mail !  Fill in the "follow by e-mail" link found on the right side of the blog just under my profile. 


Do all to the glory of God, 

Hope

Zucchini "Mac-n-Cheese"


When you want a great, big bowl of creamy comfort, try this plant-based version. It contains no cholesterol or dairy, and yet, my boys were eating it by the bowlful and asking for more!

Nothing is better for saving money during the summer months than relying on locally grown produce from farmers' markets, bought at terrific prices! Plus, the fiber will fill you up without adding to your waistline. Trust me, when you base your weekly meals around fruits and vegetables, your overall bills will plummet! 

Both people striving to reduce carbs and those increasing consumption of plant-based meals, will find this recipe to be appropriate for their dietary restrictions. 


Begin by making a double batch of oil-free hummus. My very favorite is Get2Droot's delicious, spicy hummus.  Add an additional 2 Tbsp of dijon mustard, 1 Tbsp of smoky paprika, 1 tsp. onion powder, 1 tsp. garlic powder. So, all you are doing is adding more of the spices that the recipe already calls for. 

Finally, thin it with a little plant-based milk, until it is pourable "cheese" consistency. 


Dice 1 large yellow onion and 3 minced cloves of garlic. Place them in a large pot with enough water to keep them from burning. Saute until the vegetables are softened - 5 to 7 minutes. Add the zucchini to the pot.  Add 1/2 cup of water to the pot so that the zucchini doesn't burn, while it is cooking. Reduce heat, place lid on pot, and cook for 10 minutes. The volume will be reduced by about half. 

Pour off almost all of the water from the bottom of the pan. Then, pour the thinned hummus over the top of the vegetables.  Mix with a large spoon, until the sauce is fully incorporated with the veggies. 


Continue to cook until heated through. Makes enough to serve 6-8 hungry people as a main dish. 


*Credit for the inspiration for this recipe goes to https://get2droothealthandwellness.com/

Ingredients: 

Double batch of oil-free hummus (Here's my favorite recipe
2 Tbsp of dijon mustard
1 Tbsp of smoky paprika
1 tsp. onion powder
1 tsp. garlic powder 
1/4 cup nutritional yeast
1/2-3/4 cup plant-based milk
1 large yellow onion - diced 
3 cloves garlic - minced
3 large zucchini or yellow summer squash (I used one of each) - sliced very thinly
Water

Directions:

"Cheese" sauce: 

Begin by making a double batch of oil-free hummus. My very favorite is Get2Droot's delicious, spicy hummus.  Add an additional 2 Tbsp of dijon mustard, 1 Tbsp of smoky paprika, 1 tsp. onion powder, 1 tsp. garlic powder, and 1/4 cup nutritional yeast. So, all you are doing is adding more of the spices that the recipe already calls for. 

Finally, thin it with a little plant-based milk, until it is pourable "cheese" consistency. 

Vegetables: 

Dice 1 large yellow onion and 3 minced cloves of garlic. Place them in a large pot with enough water to keep them from burning. Saute until the vegetables are softened - 5 to 7 minutes. Add the zucchini to the pot.  Add 1/2 cup of water to the pot so that the zucchini doesn't burn, while it is cooking. Reduce heat, place lid on pot, and cook for 10 minutes. The volume will be reduced by about half. 

Pour off almost all of the water from the bottom of the pan. Then, pour the thinned hummus over the top of the vegetables.  Mix with a large spoon, until the sauce is fully incorporated with the veggies. 

Continue to cook until heated through. 

Makes enough to serve 8 hungry people as a main dish or 10-12 as a side dish. 

Do download a free PDF of this recipe, click here.   As always, it's free with my thanks for being an Under the Median fan. 

Hey! If you make this, let me know what you thought. Leave a message in the comments section. 


If you enjoyed this post, you may also like: 


Follow us:  


https://www.facebook.com/underthemedian/


https://twitter.com/Underthemedian

https://www.instagram.com/underthemedian/


Receive posts via e-mail !  Fill in the "follow by e-mail" link found on the right side of the blog just under my profile. 


Do all to the glory of God, 

Hope


Saturday, July 27, 2019

VEGAN, CREAMY, TROPICAL, AMBROSIA COLESLAW


I am truly not a fan of mayonaise based coleslaw. I wasn't even when I ate dairy. But, I do like the creaminess. So, this week the 14 year old sous chef and I sat down and brainstormed how we could make a yummy, slightly sweet, but light-on-the-stomach summer salad version of slaw. Creamy, tropical, ambrosia coleslaw was born!


Creamy Topical Ambrosia Coleslaw is: 

  • Lightly sweet
  • Delightfully original
  • Perfect for potlucks or picnics
  • Crunchy and Fresh
  • Vegan!
  • A summertime treat
  • Kid friendly !


Creamy, Tropical Ambrosia Coleslaw contains NO: 

  • Added oils
  • Added salt
  • Added sugar
  • Cholesterol
  • Dairy


Ingredients:


6 cups thinly sliced cabbage
1 cup pineapple chunks
1/2 cup diced yellow pepper
1/2 cup diced red pepper
1/2 cup diced red onion
1/2 heaping cup of diced mango
1/4 - 1/2 cup unsweetened coconut

Optional: 1/4 cup small walnut pieces

1- 2 cups creamy coconut pineapple dressing


IMPORTANT RECIPE HACK! You may want to make the Coconut Pineapple Dressing first. You'll need 1 cup of pineapple chunks for this recipe. If you make the dressing first, then you will have exactly 1 cup of pineapple chunks leftover from the can of pineapple that you use to make the dressing. Isn't that awesome! So, if you want to make the dressing first, then head right on over to the recipe, whip it up in your blender (It will take you just a few minutes) and then head back here to finish up the coleslaw. We'll wait right here.


Instructions: 


Slice the cabbage. Six cups is about half of a large head of cabbage or one whole small cabbage. I seriously rarely use any fancy shredder or chopper "thingies." Nope! I quarter the cabbage, cut out the core, line it up on my cutting board and slice thinly and then cut a couple of times across the width of the slices. Voila! That's my version of shredded cabbage. If you want to use a shredder or chopper, no hard feelings. Slice away!

Throw the cabbage into a large bowl. Add the pineapple, peppers, onion, and mango. Add your desired amount of coconut and walnut pieces if you are using them. The walnuts are totally optional. Some people want a little surprise crunch of nuttiness in their tropical salads. We left it off and it tasted wonderful, all the same. Start off with adding 1 cup of the coconut pineapple dressing. Stir the coleslaw and then add more dressing as needed. I found that about 1 1/2 cups was sufficient. But, you feel free to add as much as you like to get to your desired creaminess.

Refrigerate and hour to allow the flavors to marry. But, if you just can't help yourself, you can eat it right away.

Want a free, downloadable PDF? 


Sure! Here's a link! As always, it's my way of thanking you for being an Under the Median reader and fan!

If you make it, I'd love to know how you liked it. Leave your thoughts in the comments section. 


If you enjoyed this post, you may also like: 


Follow us:  


https://www.facebook.com/underthemedian/


https://twitter.com/Underthemedian

https://www.instagram.com/underthemedian/


Receive posts via e-mail !  Fill in the "follow by e-mail" link found on the right side of the blog just under my profile. 


Do all to the glory of God, 

Hope