Saturday, December 15, 2018

20 Frugal, Fun Ways to Enjoy Winter Break


School's out for a few weeks and your kids are ready for some fun! Today, let's talk about how to keep them busy and enjoy some family togetherness without breaking the bank.

#1:  Bake Cookies.

  Nothing is better for bonding than cooking together. Decorate your baked creations with colored frosting after they cool. Then, wrap some of them up and then deliver goodie trays to neighbors.  Here are a couple of my favorite recipes to get you started.

Chocolate crinkle cookies.
Snickerdoodles.
Sugar cookies.

#2:  Binge Watch Your Favorite Movie or Television Series 

Once again, we have some favorites in this category.  We switch it up a lot.  One year we may binge Star Trek. While other years, it may be Andy Griffith. The Lord of the Rings Trilogy was last year's choice. We generally begin talking about it and narrowing down our choices in mid November.  Finding a time when all six of us can be home for the annual binge is getting challenging though.

A great way to see television programs and movies is through Amazon Prime Video.  You can get a 30 day trial right now.  Click here for more information.  

#3:  Go for a Winter Walk.

  Put on those hats, coats, and mittens and get outside to explore winter.  Usually when we are all wearing our warm clothing it's because we are shoveling the driveway together.  LOL!  Well, this activity is a great change of pace.  Walk at a local park or nature trail to see how nature gets through the cold winter months.  Be sure to have cocoa and coffee when you get back home! 

#4:  Go sledding.

We have a small hill in our backyard, which the boys use as soon as there is any snow on the ground at all.  But, the parks have larger and longer hill for sledding fun!  You'll get your cardio workout going up and down the hill multiple times too!  

#5:  Work Puzzles.

One of my favorite childhood memories is working puzzles with my mother.  Every winter we worked puzzles in the dining room on a little square folding table.  Puzzles help children learn problem solving skills and improve eye/hand coordination.

Here is one of our very favorite puzzles.  


https://amzn.to/2EyFYcu


We have had it for well over a decade and have worked it countless times!  This body puzzle is four feet tall and double sided.  The internal organs are labelled on one side and the bones on the other.  It is actually pretty challenging.  After we finished building it the kids would lay on it, beginning with the youngest to see how well their body matched the size of the one on the puzzle.  They loved it and it made me smile.  My oldest son, who once fit perfectly on the body puzzle, is now 22 years old and 6 feet 4 inches tall.  I'm keeping the puzzle for my grandkids to work!

#6 - Listen to Audio Books.

  Check your local library for a huge array of audio books.  You'll find every genre and something for every member of the family.

https://amzn.to/2LiyDyy

 The Focus on the Family adaptation of Dickens', The Christmas Carol, is really well done and very engaging even for the little ones.

#7 - Coloring pages are fun for all ages.

I have loved coloring since I was a young child. So, sit down, relax, and build family togetherness with this great activity. Make a photocopy of the same page for everyone in the family and then talk together as you color. Admire everyone's finished picture and then hang them all up on the fridge or send the children's masterpieces to Grandpa and Grandma or a favorite aunt or uncle! They will love this act of kindness!

https://amzn.to/2S1d2wY


Together: A Mommy + Me Coloring Book has side-by-side pages with one drawing for the parent and the other for the child.  I love this idea!  

#8 - Plan a family Read-aloud day.

  At least one day during winter break we pick a chapter book to read.  We start right after breakfast and continue throughout the day, taking breaks for snacks and meals. It is SO much fun! The kids ask for it every single year! This gives us a chance to read books that aren't related to specific school subjects. They are just books that we want to experience together!


Here's one of our favorite Christmas break books!  The Hobbit by J.R.R. Tolkien


#9 - Go caroling with friends. 

This is an old-fashioned Christmas fun!  If you don't want to carol for the neighbors, try a nursing home. One year our family took some sound equipment up to the local retirement home on Christmas Eve and sang for the residents. My kids remember this evening very well and it made some older folks smile and remember their own Christmases when their children were young.

#10 - Visit church shut-ins.

This is another activity which allows your children to not only bless an older generation, but also to learn from them. I am absolutely delighted when an older person interacts with my child, telling them stories about what life was like when they grew up and teaching them important moral and spiritual lessons along the way. 

#11 - Have a DIY Craft Day.

We have all of our arts and crafts supplies organized in our art closet. Christmas is the perfect time to plan an entire afternoon dedicated to creating festive crafts together. I seriously just start dragging items out of the closet and put them on a large table. I place some of our craft idea books next to the pile . Finally, we grab scissors, glue, and paper and let our imagination run wild!

https://amzn.to/2BlGFSG


This delightful Christmas craft book by Mary Engelbreit has a large variety of activities in it. The photo is my copy of this book and we used it more than one Christmas season.  I love her illustrations too!  

#12 - Roast chestnuts.

For years, Yuletide dinner at my brother-in-law's home ended with chestnuts, freshly roasted in his fireplace. This is a staple of Christmas in Europe! If you don't have a fireplace you can still enjoy this wonderful woodsy treat! Here is a link to a post with fantastic step-by-step directions.

#13 - Have a cocoa and animal crackers afternoon.

This tradition began many years ago, when my oldest son was about seven years old. 

Whenever it snows, we all head outdoors early in the morning to clear the drive. Then, the kids sled down the hill in our backyard a few times. We follow this up with a round of hot cocoa and animal crackers.  

#14 - Play Board, Dice, and Card Games.

Games hone your child's critical thinking skills, improve logic, and encourage healthy social interactions. Games were one of the first ways that my children learned the concept of "taking turns." Additionally, when you are five years old, there is nothing better than proclaiming that you just beat Dad at a game of skill. Here is a photo of items that I gathered from our game closet. 


Farkle is probably one of my personal favorites for all ages. It's fast paced and even younger members of the family can understand and follow the rules. And, hey, you can find it at an amazingly low price at Amazon!

Phase 10 comes in a dice or a card game and is by the same people who brought you Uno. The card version is super inexpensive. We have the dice version and it was a gift. Phase 10 is another game which would be fantastic for cheap family fun. Get it from Amazon! You just can't beat the price. 

#15 - Turn off all the lights and make a shadow play 

Kids love creepy shadows on the walls! It's been a long time since we have done this! I like the ease of making bunnies and birds. My older boys did a dynamite wolf and duck! You can take turns with each person making a shadow which other family members just try to identify. After you have identified the animal then everyone in the family gets to make that animal's sound. You vote on who did the best animal voice impression! 

#16 - Drive around and look at Christmas lights.

Every town has one home or even an entire neighborhood that goes all out for Christmas. It's great fun to drive around with the kids and look at lights. Many communities sponsor Christmas light festivals on a large scale. These events sometimes cost a bit to drive or walk through. But, it's worth the small price of admission! 

#17 - Go to free community Christmas activities. 

I have a whole list of free or nearly free Christmas activities in this post.  We have some favorites which we attend every single year.  Other times, we try some out for just a year or two.  The point is to let your kids help pick some special activities to try.  You never know when you will hit upon one which will become a new Holiday family tradition!  Look on-line or ask around. You're sure to find so many that you can't fit them all on your calendar. 

#18 - Build a blanket fort in the living room.

My boys love doing this! Gather up blankets, clothespins, pillows, and blankets and let your future engineers have at it! After they have built an elaborate "cave", read books  inside, and later let them sleep in it overnight.

#19 - Go skating.

My grandparents built their retirement home right near a lake the year I was born. My grandfather tried in vain to teach me to skate. I was bad at it. But, it was fun to see him elegantly skating circles around the lake. He imprinted my name on the lake's surface by moving snow around with a large shovel. When we returned to the house, which overlooked the lake, I was able to see the imprint of H-O-P-E in huge shoveled letters from the gigantic picture window in their living room.  So, even if there are a lot of spills and mishaps, skating indoors or outdoors is a fun and memorable family activity. 

#20 - Tell family stories. 

My boys love to hear stories about how my husband and met, how we grew up, and how we've seen God work in our lives and meet needs. They ask to hear the same stories over and over again. Brew a pot of tea and have a completely open Q & A session.  We let them ask whatever they want.

Whatever you choose to do, take time during the holidays to connect as a family.  It's important to you and your children, too!

What did I miss?  I'd love to hear about your family holiday time traditions!  How do you connect, create traditions, and memories in your family?  Leave your stories in the comments section. 

Don't Miss Any of Our Posts! 

Follow us:  


https://www.facebook.com/underthemedian/


https://www.youtube.com/channel/UCalhGzHdjoEn18XraUxsFHg


https://twitter.com/Underthemedian

https://www.instagram.com/underthemedian/


Receive posts via e-mail by filling in the "follow by e-mail" link on the main page.  


Do all to the glory of God, 

Hope


Thursday, December 13, 2018

Cheap Eats: Kuri Squash Marinara Sauce


I got a ridiculously good deal on a huge box of kuri squash at the end of the growing season.


 There were about 30 small squash in a box for $10!  So, I've been cooking and experimenting with kuri squash for the past three weeks.  Tonight I needed something quick for supper. I had some cooked squash in the fridge and a few other odds and ends of herbs.  It was actually the fresh basil which inspired this sauce.  Pasta is just a natural pair with basil! 


Here are the basic ingredients for this pasta sauce:  crushed tomatoes, red pepper, onion, garlic, fresh basil, and fresh parsley.  I also used gluten free spaghetti from Aldi.


I'll post the whole recipe below.  But, it's your basic "dump and heat" recipe.  Easy peasy and SOOO good!  You can keep it chunky, as shown here, or puree it.  Or use it chunky on pasta and then puree it for pizza. 


I have some of it pureed and plan to use it as a sauce on homemade pizza this weekend! 


Kuri Squash Marinara Sauce

Yield:  4 cups

Ingredients: 


1 small kuri squash roasted and flesh removed - about 2 cups (acorn squash can be substituted)
16 oz. salt free crushed tomatoes 
1/2 red pepper
1/2 cup diced onion 
2 cloves garlic - minced
2 Tbsp. fresh chopped parsley ( or 1 tsp. dried)
2 Tbsp. fresh chopped basil  (or 1 tsp. dried)
1/2 tsp. garlic powder 
1 tsp. onion powder 
1 Tbsp. real maple syrup or sugar
1/2 tsp. fresh cracked black pepper 

Preheat oven to 400 degrees.  Wash the outside of the kuri squash, cut in half, and scrape out seeds.  (If saving the seeds to roast later place them in salt water and place in fridge.  Otherwise, just discard the seeds.) 

Place the squash cut side down on parchment paper covered baking sheet.  Roast for 40-50 minutes.  When you can pierce it with a fork easily, it is done.  Cool and remove squash flesh from the outside skin.  The skin of this squash is thin, so do the best you can.  If the squash is organic you might want to keep the skin, cut in into smaller pieces, and throw it in your next batch of homemade vegetable soup.  

To make the marinara sauce, saute the red pepper, onion, and garlic in a pan with a little bit of water.  Use just enough water to keep the vegetables from burning.  The water takes the place of oil, which is really not needed and just adds extra calories.  Add the squash, tomatoes, and the remainder of the ingredients except the black pepper.  

Simmer for 15-20 minutes to let the flavors marry and the vegetables finish cooking.  You can either use it chunky or puree it for a smooth sauce.  


For a free downloadable PDF of this recipe, click here

Enjoy!

Remember, 
Do all to the glory of God, 

Hope 


Tuesday, December 11, 2018

How HyVee Just Made My Holiday Parties Easier, Healthier, and Less Expensive!


HyVee just made my holiday parties easier, healthier, and less expensive!  On Monday, for one day only, they offered to take 20% off of all the produce you could fit in this standard size shopping bag, including sale items.

 This time of the year we all have holiday gettogethers, which require taking food.  There is nothing easier to make and take than a snack or side dish, which is plant-based!  

HyVee made the same offer just a month ago.  Here's a link to a post where I show you what I got last month. I hope this is a trend that we see continuing into the New Year, because I love it when a grocery chain is dedicated to helping make it possible for you to feed your family fresh, nutritious food at a great price!


I had three other commitments on Monday, but I was determined to not miss out on this fantastic deal!  I looked through this week's ad, made a list, and stopped by my local HyVee at 9:20pm.  I was in and out in 20 minutes, toting a boatload of fresh fruits and veggies for which I paid just $11.42!


My HyVee Haul!
 

What I Got: 

Here are some highlights of what I bought. The prices I list are before the 20% discount!   I'll give you ideas on how to use it for the holiday party scene. Plus, we'll take an in-depth look at the Misfits. 


I bunch of green onions for $.88.  Half of these are destined for my ginger lemon quinoa salad.  This delicious salad is always a hit at church potlucks. Yum!  It was a featured Cheap Eats recipe.  Here's a link.  

The other half of this bunch will be making an appearance in potato salad.  I know it's generally considered a summertime dish.  But, the 14 year old sous chef and I have had a hankering for potato salad all week! 


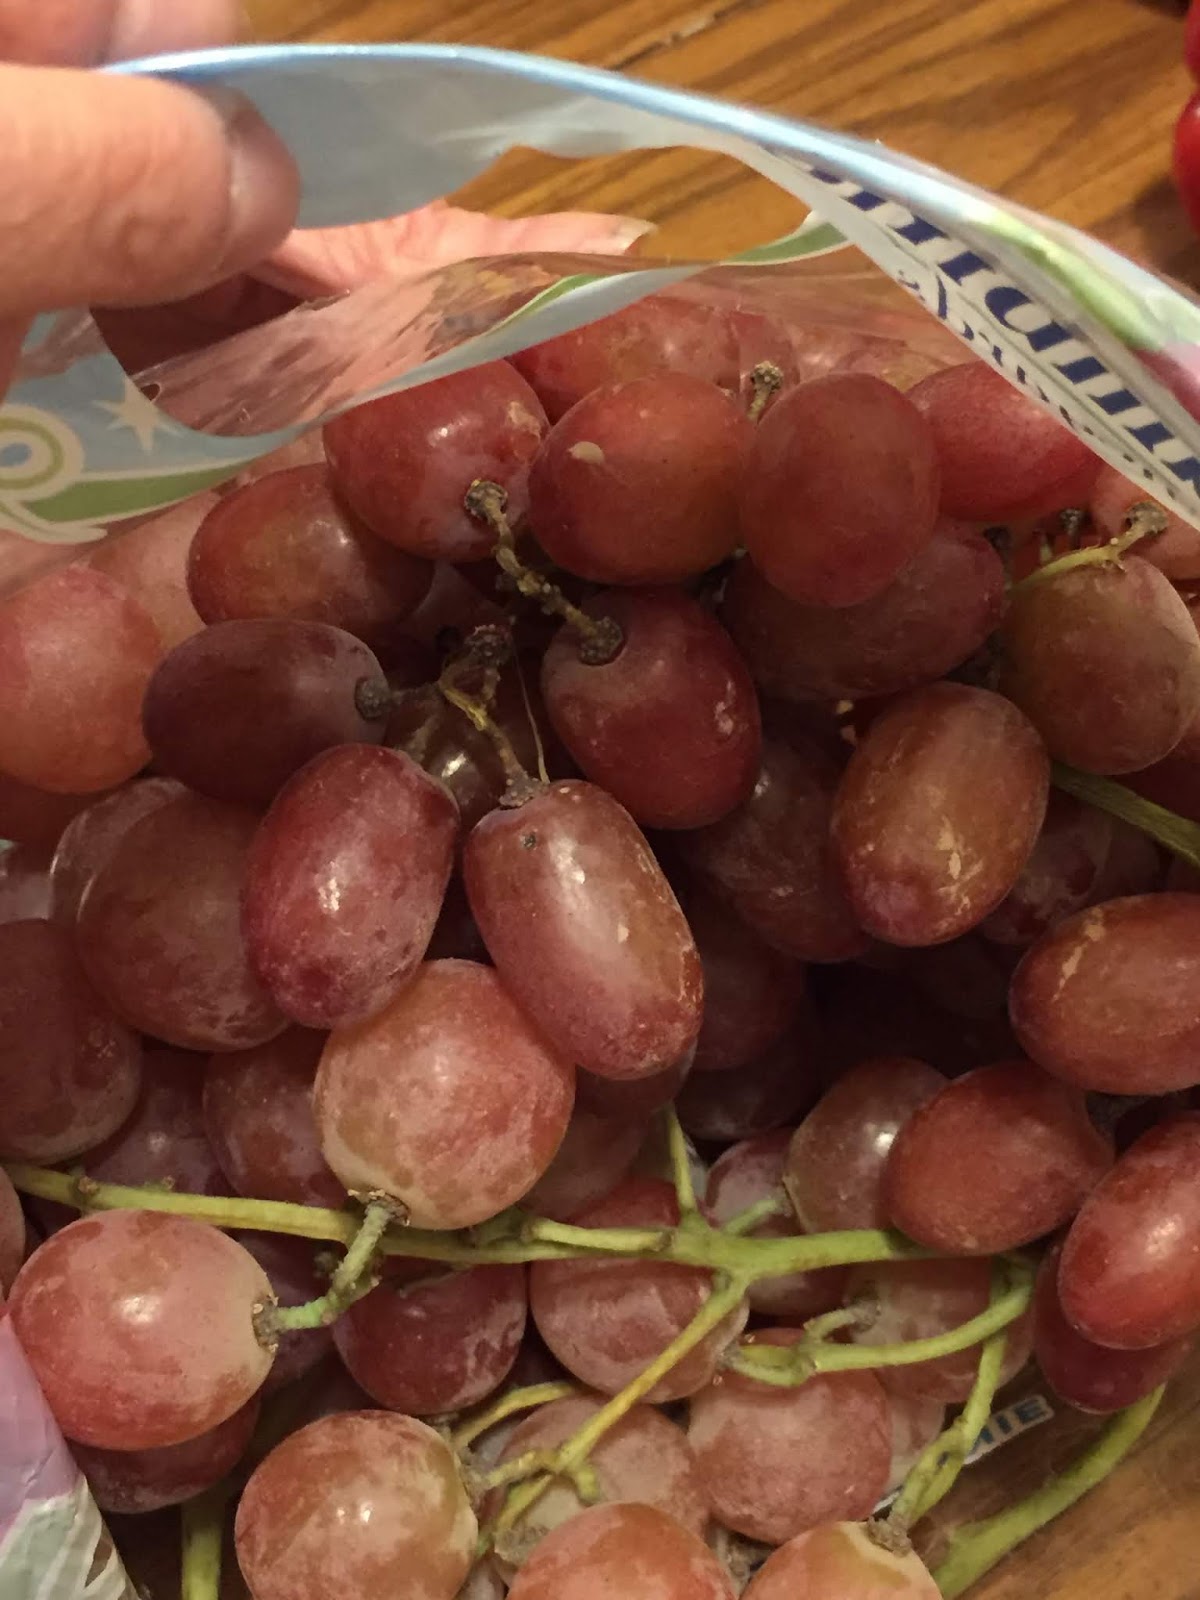
Red grapes.  On sale for $.77 a pound!  I love that HyVee  allows you to apply the additional 20% discount to items which are already on sale.  This makes it so economical to stock up.  That makes these grapes just $.62 a pound!  I bought about 7.5 pounds.  

About half of these are destined for a high school Christmas party for 30 hungry teens on Friday.   What a great, healthy, easy snack!   Add fruit dip  on the side and be sure to bring along toothpicks so they can skewer their grapes to grab and go.   


HyVee's store brand of bananas are always priced at just $.49 a pound.  I've not seen bananas anywhere in town at a cheaper price on a regular basis.  With my 20% discount, the price per pound was reduced to just  $.39!  It's time to make triple chocolate banana bread for friends and neighbors! 

The camera hardly does these justice.  The sign said, "extra large red peppers" and they weren't kidding!  They are mammoth!  At just $1.67 each (3 for $5) they were an amazing value!  I'll use them for three recipes.  Potato salad, my lemon quinoa salad, and I will be able to slice the bottom portions to serve with healthy hummus! 


Here's another photo, which shows how large these red peppers are.  It is larger than the length and breadth of my hand!


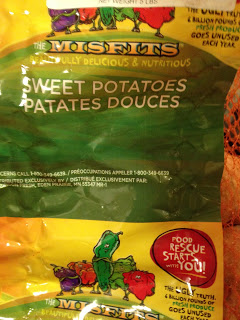
Misfit Sweet Potatoes


I bought another 5 pounds of misfit sweet potatoes for just $3.99. Have you heard of sweet potato hummus?  Meet my new friend!  Here's a link!  Take it to your next party.  Amazing! 
I want to take a short moment to go a little in-depth about why I like Misfit produce so much. Plus, I want to tell you that Hyvee did something super important since I posted last month about Misfits. 

I explained misfit produce to you a few weeks ago.  Here's a link.  In short, this fantastic program allows HyVee to partner with a national distributor to purchase produce which would otherwise never be sold.  There's nothing wrong with it.  It is just considered too large, small, or "ugly" by conventional standards.  

Here's why I like this program: 

It helps combat the problem of food waste, while offering customers a quality product at a reduced price.

I just did a review of the movie:  Wasted: The Story of Food Waste. In it, I highlighted a grocery store on the East coast, which purchases food, otherwise destined for landfills, because it doesn't fit the perfect profile which Americans have come to expect when they visit the grocery store.  This is exactly what HyVee is doing with the Misfit Produce program!   It is not only economical, it is a step in the right direction toward environmental responsibility! I am delighted!  Yay, HyVee!

Here's what else HyVee did!

Last month I had one small complaint about the Misfit Produce display.  It either did not clearly display the prices of products or the prices were missing altogether.  Well, HyVee stepped up to the plate!  When I walked in last night, the signage on the Misfit Produce display was perfect!  Every single item was clearly marked with and easy-to-read, clearly displayed price.  Once again, yay, HyVee!  

What do you think?

 HyVee is consistently getting high marks with my with my grocery store dollars!  I'd love to see your thoughts and feedback in the comments section below. 

Don't Miss Any of Our Posts! 

Follow us:  


On Facebook athttps://www.facebook.com/underthemedian/ 

Receive posts via e-mail by filling in the "follow by e-mail" link on the main page.  

On Youtube  at:https://www.youtube.com/channel/UCalhGzHdjoEn18XraUxsFHg 

On Twitter at: https://twitter.com/Underthemedian 

On Instagram at:  https://www.instagram.com/underthemedian/


Do all to the glory of God, 

Hope


Monday, December 10, 2018

A Step-By-Step Guide to Making Homemade Vanilla


A recent trip to SAMS to replenish my dwindling supply of vanilla, led me down the path of DIY vanilla extract.  I could not believe the astronomical jump in the prices since the last time I bought vanilla.  After being assured by family, friends, and readers on Facebook that making your own vanilla was pretty easy,  I decided to give it a go!  

(This post contains affiliate links.  If you make a purchase, I will be compensated.  Thank you.)  

Choosing Beans:  


It was harder to choose vanilla beans than I thought it would be.  The price and quality vary wildly.  After reading a lot of reviews, I chose to purchase 5 Grade A beans sold by Slofoodgroup.   By far, Slofoodgroup had the highest overall ratings of all the companies I checked. 


Although Slofoodgroup does sell Grade B beans, I was totally freaked out by the reviews of Grade B beans sold by another company.  Words like:  dried up, unusable, and moldy appeared again and again.  Many people said that they preferred the more pliable Grade A beans. 

In the end, I went with Grade A beans, which are plumper and generally larger overall.  I didn't want my first experiment in vanilla-making to be an epic fail.

After making my vanilla, I have read and researched even more and discovered that Grade B seems to be just fine for vanilla-making.  I have included links below for both Grade A and Grade B beans.  I was so impressed with the quality of their Grade A beans, that the next time I plan to buy Grade B beans from Slofoodgroup and get twice as many beans for the same amount which I spent on the Grade A version. 


I was super pleased with the beans when they arrived!   They were moist, plump, and longer than I had anticipated.  I read the manufacturer instructions and cautions.  Although vacuum packed, vanilla beans are rather perishable.  You need to use them within a month of their arrival.

Directions: 

Step 1:  Slice the vanilla beans


Some directions assure you that slicing is not necessary.  Others say to cut the beans into small pieces.  Regardless, of how you get those beans into the alcohol, the flavor will diffuse right through the wall of the bean.  Given the fact that I immediately smelled a distinct vanilla flavor even before I opened the vacuum-sealed package, I have no doubt that this is true. Being a "split the difference" person at heart, I split one bean straight down the entire length and cut the others in half.  

Step 2:  Place the beans in a jar


I chose an 8 ounce dark glass jar.  Nothing I read on-line suggested that dark glass was any better or worse than clear glass.  But, the vanilla does need to cure in a dark place.  So, it made sense to me to put it in a dark glass jar, since I already had one on hand that was the right size.  

Step 3:  Cover with vodka and seal. 


Be sure the vanilla beans are covered completely in alcohol.  Leave enough space at the top so that you can shake the mixture.  

Step 4:  Let it diffuse for at least a month


Leave the jar in a dark place for at least a month and up to six months, shaking vigorously once a week. 

Much like reusing a tea bag to make a second and third cup of tea, after a couple of uses, the beans will  no longer flavor the strong alcohol.  Once the beans have lost their effectiveness, you can remove the beans and place them in a bowl of sugar to make vanilla sugar.  

It makes good sense, given the cost of the beans, to "top off the bottle" with more alcohol once you have taken out half of the vanilla.  If you add more beans periodically, and you can keep the same jar of vanilla going for years.  

If you'd like to give it a try, there is a list of supplies and links below.

Supplies and Instructions:

  • Vanilla Beans (3-5 beans for each 8 oz. of finished vanilla)
  • A sharp knife
  • Cutting board
  • Vodka - at least 80 proof - (Rum will work too, but the flavor will be different)
  • Glass bottle for infusing   
  • Small funnel
  • Decorative bottles to store your vanilla or to give as a gift. 


 Grade B vanilla beans. Available in 10, 25, and 35 count packages.  $27 - $72. 
https://amzn.to/2zEK52Q
 
 
Grade A beans.  These are the ones I ordered. 
 $23.99 with free shipping.
https://amzn.to/2rmrRyG

Bottles for infusing.  These could also be used as gift bottles. 
$16.87 with FREE shipping for a Set of 6 bottles


https://amzn.to/2SuM29c


Bottles for infusing or gift giving.  These are identical to the one I used. 
  8 oz Boston Round Glass Amber Bottle With Poly Seal Cap and One Funnel.  Set of 4 bottles.  Just $11.99 with FREE shipping.  


https://amzn.to/2Su0ZIi


These smaller 4 oz. bottles would be perfect for gift-giving! 
$13.99 with FREE shipping for a set of 12! 


Instructions: 

Slice the vanilla beans down the center or across the middle into as many pieces as you would like.  Place the pieces into a glass jar.  If slicing beans lengthwise, you will need to be sure that the beans are able to fit fully upright in the jar.  It is fine to cut the beans in half if needed.  Cover with at least 80 proof alcohol - vodka is preferred for its neutral flavor.  But, rum can be substituted.  Place the lid on the jar.  Shake vigorously.  Then place in a dark, cool place, for at least 30 days and up to 6 months, shaking once every week.  The vanilla is done when the vodka taste has been replaced by the vanilla flavor.  
You can "top off the jar" with more alcohol once you have used half the mixture and allow it to re-diffuse for a few weeks before continuing use.  You may add fresh beans as needed, keeping the same batch of vanilla going for many years.  
After the initial beans have lost their essence, you can remove them and place in a jar of sugar to make vanilla sugar.

For a FREE downloadable PDF with supplies and instructions, click here.  

If you've made vanilla or you give this recipe a try, I'd love to hear about your experience in the comments section!


Don't Miss Any of Our Posts! 

Follow us:  


On Facebook athttps://www.facebook.com/underthemedian/ 

Receive posts via e-mail by filling in the "follow by e-mail" link on the main page.  

On Youtube  at:https://www.youtube.com/channel/UCalhGzHdjoEn18XraUxsFHg 

On Twitter at: https://twitter.com/Underthemedian 

On Instagram at:  https://www.instagram.com/underthemedian/


Do all to the glory of God, 

Hope

Saturday, December 8, 2018

How My $17 Kroger Markdown Haul Will Feed My Family For An Entire Week!!


This week I prove you don't have to spend a boatload of money to feed your family!   

I just posted about my great Kroger markdown deals.  My weekly menu plan will be based on that $17.40 grocery store purchase!  Let's see how those items translate into feeding a family of five for an entire week!

I had to use a few items that I already had on hand.  But, even factoring in the price which I already paid for those items, the total cost of this week's menu is still well under $50! 

Here's a reminder of what I got.  


1 pound of mustard greens - $1.49
1 "Nourish" bowl for just $.49!
6 assorted organic yellow and green zucchini - $2.00
2 pounds of pea pods - $3.99
1 container of Baharat blend seasoning - $2.49
1 container of chocolate fruit dip - $.99 for our high school Christmas party
2 - 32 oz. organic vanilla Greek Yogurts - $2.89 each

To see photos and descriptions, read this post.

This Week's Menu: 

 Breakfast:   


Yogurt parfaits
Steel cut oats with blueberries
Cream of wheat
Pancakes
Museli

Lunches: 


Homemade baked beans - easy and delicious!

*All lunches are served with a salad, carrot and celery sticks, and fresh fruit
Split pea soup
Smoky white bean soup
Homemade baked beans (These are the best and easiest baked beans I have ever tried! I make them in the crockpot.  I follow the recipe exactly as it is printed except I add a touch of liquid smoke.)  
Sauteed mustard greens with garlic and lemon
Chili mac
Chili and peanut butter sandwiches (We call this "school lunch" because when I was a kid, the school cafeteria always served a bowl of chili with a peanut butter sandwich on white bread.)  

Supper:   


(I bulk cooked! Be sure to check out the photos and descriptions!) 


Tomato Mexican Cabbage over brown rice
Nourish bowl tortillas 
Garbanzo beans in tomato and cream sauce

 Photos and Descriptions:  

Thai Peanut Noodle Stir Fry


This was awesome!  I let the 14 year old sous chef pick the pasta for this dish.  He chose multi-colored rotini.  It was very, very tasty! 

Tomato Mexican Cabbage over brown rice


I got this recipe from a fellow reader on a vegan FB page.  It's simple and delicious.  Here are her instructions:  "water sauté onion and garlic till translucent. Then I add 1/2 head of cabbage thinly sliced into strips, 6 oz tomato sauce,2 T tomato paste, cumin and oregano , frozen corn and cook on medium about 10 minutes. Add beans at the end. Top with scallions, or olives, or avocado or jalapeños! Or all of the above! I serve it with tortillas and rice." 

Nourish bowl  

There was $1.00 manufacturer coupon on the front!  So, I paid just 49¢! 

My boys said this was delicious!   The container was enough to fill a serving bowl and cooked in the microwave in just 4 minutes.  Although the package indicated that it was one serving, it is easily large enough for two.  If you are sensitive to dairy, be aware that the sauce contains milk.  It contained 540 mg. of sodium, which is a little high for me.  But, unless you are severely salt restricted, it's not too bad. The real food ingredients: butternut squash, kale, kohlrabi, and brown rice were amazing!  


The boys ate some of it plain and then opted for it rolled up in a tortilla with either vegan sour cream or regular sour cream.  

 Garbanzo beans in tomato and cream sauce


It tastes as good as it looks!

 This recipe came from my amazing readers.  I sent out a "help a girl" plea for ideas on how to use the baharat spice blend that I got marked down to $2.49.  It turns out that this blend is very similar to one of my favorite spices, garam masala.  

My readers came through with suggestions and instructions.  They ranged from:  

"a great add-in to rice"
"a rub for chicken"
"whole roasted cauliflower"

I chose the vegan version of the recipe from my reader,  Tamara.  Here are her directions:  

"Onions, tomatoes, tomato sauce, garlic, salt, pepper, butter, cream. Simmer together. Add sauteed boneless, skinless chicken thighs-cut in small pieces. I have also added green beans. It has to simmer so if you want to add zucchini I would saute separately and serve with it. If you want vegetarian chick peas are good in it. If vegan substitute olive oil for butter and almond milk for cream. I don't do soy but it would probably be good with tofu. Serve over basmati rice. Baharat seasoning is a middle eastern, Indian seasoning mix, very similar to garam masala blend." 

Creole Zucchini over Brown Rice


I used to beg my mother to make creole green beans.  When I got those six organic yellow and green zucchini for just $2.00, I wanted to make creole zucchini and put it over brown rice.  It's a great main dish meal for just pennies! 

Shepherd's Pie

  
Warm and tasty comfort food!  The base is comprised of lentils and vegetables in a flavorful tomato sauce.  It's all topped by fresh mashed potatoes!  It fills a huge 11 X 14 inch pan!  In case you missed the recipe link in my listing of dinner meals, here it is again.   

What's for dinner this week at your house?  

Let us know in the comments section. 

Don't Miss Any of Our Posts! 

Follow us:  


On Facebook athttps://www.facebook.com/underthemedian/ 

Receive posts via e-mail by filling in the "follow by e-mail" link on the main page.  

On Youtube  at:https://www.youtube.com/channel/UCalhGzHdjoEn18XraUxsFHg 

On Twitter at: https://twitter.com/Underthemedian 

On Instagram at:  https://www.instagram.com/underthemedian/


Do all to the glory of God, 

Hope